Friday, October 25, 2013

W 18 Month Update

So...this is super late.  But he did just have his 18 month check-up the other day, so it's cool, right?
I can't believe my baby is a year and a half old.  And this whole month he was all "big boy" no "baby."  Part of that might have been because this month was the worst of my back problems so he was spending a lot of time with The Sailor, all I know is he just feels so darn grown up.

So, he's still lingering around 25 pounds and wears 24 month clothes and size 5.5 or 6 shoes.  Since he potty trained this month all his pants fall off though, haha.

We didn't go to any classes this month because my back was so messed up and the act of pulling him out of the car seat was damn near excruciating for me, but we played outside behind our house a lot to make up for it and he made lots of trips to the parks around base with The Sailor.

At the beginning of the month we had some pretty miserable teething days, but no molars actually popped through!  So frustrating! But he enjoyed getting mini ice cream cones to help deal with the pain.

In other eating news, he has started to prefer using a fork and having a plate (as opposed to eating with his hands right off his tray).  I think this is another factor making him feel more "grown up."

With all the trips to the playgrounds with The Sailor he has mastered going down the slide by himself - backwards.  And he could do this for hours.  He loves climbing up and sliding down and climbing up and sliding down.  I actually think The Sailor gets more nervous watching him then I do, which is funny to me.

And he's getting much better at coloring!  Instead of just eating crayons he actually doodles quite a bit!

At the very end of the month we got rid of his crib.  It was not a fun transition, but I couldn't bend over any further to get him out because of my belly/back and he was almost able to climb out.  Those first few nights he would wake up, run to his door and start pathetically calling out "Moooooommmmmyyyyyyy" but if I went in to comfort him he would completely melt down and take hours to get back to sleep.  It eventually got better, but that wasn't until his next month so I'll leave that for our next update which is due in like a week, lol.

Does anyone else find it super hard to keep up with these updates?  But I totally wish I had more of them to document his milestones and personality from when he was an infant so I'm really trying to keep up...

Wednesday, October 16, 2013

Wear Your Baby Wednesday - Chevron Tie Dye Your Wrap!


My name is Amanda and I have a problem...I'm addicted to dyeing wraps.

Phew!  I feel better after getting that off my chest!

Let's quite the chit chat and get down to business now, shall we?

Supplies:
The key to getting the dye job to turn out in this chevron pattern is precise folding (which is why you need the iron).  I literally ironed a crease in each fold that I did and I do not think it would have been successful (especially with the thickness of the wrap once it was all folded up) if I had skipped this.

As usual, first wash your wrap with textile detergent.  You can use "normal" detergent if you're in a bind, but I'm a better-safe-than-sorry type gal when I'm permanently altering expensive fabrics.

Then you get to folding.  First you're going to accordion fold the entire length of the wrap.  I started with the tapers (which are super long on an Ellevill wrap, by the way) hanging off my ironing board:
Then I reached to the other side and carefully pulled the fabric up to make my first accordion fold:
And I ironed the creases.

Then I continued for the entire length of the wrap being careful to make the folds as equal as possible and ironing in between each fold.
Once it was all folded and ironed I folded up the tapers of the wrap (and you guessed it - ironed those folds as well).


Next you'll take the top corner and fold it at a 90 degree angle.
And iron that crease (yes...you're still ironing ever crease).

Then you accordion fold that corner.

I tried to get more pictures, but because of the thickness of the wrap I couldn't take my hands off of it or else the folds (despite being ironed) came un-done.  All you have to do is continue to accordion fold the rest of the fabric on an angle and then secure it every couple inches with elastics.


The hardest part is over...woohoo!

Before I started this wrap I actually decided to try and "map out" the colors I was planning on using and it was a huge help while I applied the dye.  All I did was take screenshots (by hitting control+print screen) of the color chips from the Dharma Website then arrange them using Paint.  This is the pattern of colors I decided on:

Before you can start applying dye, soak the whole wrap in a soda ash solution for 30 minutes.  While my wrap sits in soda ash I mix my dyes.  And this wrap used a lot of dyes:
The colors were Dharma seafoam, paris green, turquoise, azure blue, wisteria, power berry, and jet black.

Then place your tied up wrap in a bin on top of a rack (so it doesn't end up sitting in dye) and apply your dye using squirt bottles:

Then let it sit.  Some people say overnight is fine.  Some people say 12-18 hours.  I like to let it sit for 18-24 hours just to be safe.

Then it's ready to be rinsed!  I'm a bad person and instead of running water over it to rinse it, I toss it right in the washing machine.  First I did a cycle with Synthropol then I did two full cycles without any detergent to make sure all the dye was out.  When you're removing your elastics, be careful...I've dyed a bajillion things and I still do stupid stuff like splatter blue dye all over my face.

And...you're finished!  Isn't she a beauty?


As usual, if you have any questions feel free to ask!  And don't forget to check out my other dye tutorials and babywearing posts here!!

Monday, October 14, 2013

Baby Deux - Weeks 23, 24, and 25


Oh hey, remember me?  The worst blogger ever?

I actually have a pretty valid excuse for disappearing for almost two weeks; although my back is feeling amazing compared to how it felt a month ago it still isn't perfect and when I sit upright for extended periods of time it hurts like hell.  Like I'm sitting right now in order to type this on my desktop computer...

But any-hoo...viability!!!  That one is pretty exciting!  Basically all it means is if BabyDeux tried to take an express pass through his gestation and high tail it out of my uterus there's a chance he would survive.  He definitely needs to cook a bunch more, but if it happened it wouldn't necessarily end in tragedy.

The heartburn has started.  Sometimes it comes if I haven't eaten in a while.  Sometimes it comes right after I eat.  Sometimes it comes when I'm sitting down.  Sometimes it comes when I'm standing up.  Sometimes it comes when I'm laying down.  It is completely unpredictable and completely shitty.  So I have to make sure I have Tums on me at all times.

I've been having weird insomnia when I fall asleep fine in the evening but then I wake up at like 1 and can't fall back asleep until like 5.  It flipping sucks.Which may be contributing to the fact that I get exhausted super easy.  Yesterday The Sailor and I tidied up the entire house (which was a hot mess from me being hurt for so long) in preparation of a cleaning lady coming today to actually deep clean and I was exhausted by the end of the day.  And it wasn't like I was doing anything intense, I was just puttering around putting things where they're supposed to be!

I actually feel kinda cute right now.  It probably helps that I definitely no longer just look fat and I got some cute maternity clothes, but we'll see how long it lasts.  I'm always jealous of the women who feel gorgeous and feminine throughout pregnancy...I just feel like I'm going through puberty all over again and getting fat at the same time.

Little dude is super active.  He's actually kicked me in the cervix a few times and it's really not cool.  It feels like someone is violently checking to see if you're dilated only from the inside.  Even The Sailor has been able to feel kicks from the outside, but he's not that interested in it.  It actually makes me pretty upset that he really has no interest in my belly; when I bring it up he generally says he'll be excited when he gets to meet him in January...which is great.  But I'd like to have someone actually be excited about this pregnancy with me.  My Dad would much rather talk about W and my Mom was completely disinterested in my pregnancy with W, too so I wasn't expecting much excitement from them.  But I figured since The Sailor would actually be home this time around he would show more interest in it.  On top of that, despite having significantly more local friends for this pregnancy (in case you don't remember I moved from the East to West coast when I was like 5 weeks pregnant with W) no one really seems all that excited.  Maybe I'm just imagining it, but it's almost kinda lonely.

In happier news we started actually putting furniture in the new nursery!!!


Crib - craigslist - $100
Changing Table - Yardsale - $60
Rocker/recliner - Yard sale - $20 then $55 on reupholstering supplies.

The banner and a few other wall decorations I got from Joann's in the teacher section, I got a few things from the Target cheapie section that I'll be using for different projects, and the only big thing left to purchase is a ceiling fan and about a bajillion projects left to do, haha.

The chair is blocking part of the closet, but it's no big deal because I can still easily access one side of it which is all I'll need on a regular basis. There won't be a dresser, I'll organize his clothes in the closet in hanging shoe organizers just like I did (and still do 18 months later) with W. And obviously the random stuff on the windows won't be staying there!

And some "symptoms" that didn't make it onto the collage - apparently BabyDeux is comfortably resting on my bladder because sometimes when he kicks or I sneeze (or laugh, or bend over...) my bladder leaks.  Super fun Not!

But what is super fun is nesting.  I'm not usually a super clean freak.  If the house is a bit messy I'm really not bothered by it.  But we got a carpet cleaner yesterday and I was pee-my-pants-excited (hardy-har-har) watching The Sailor clean our couch.  Then we had a cleaning lady come today to deep clean the house and I've been absolutely giddy about it.I loooooooooove how clean my house is right now.

And  think that's all for right now!  I didn't take a 25 week picture, we were too busy cleaning up the house yesterday...


Wednesday, October 2, 2013

Wear Your Baby Wednesday - Shibori Dye Technique aka MORE wrap dyeing!


Remember that time I told you 
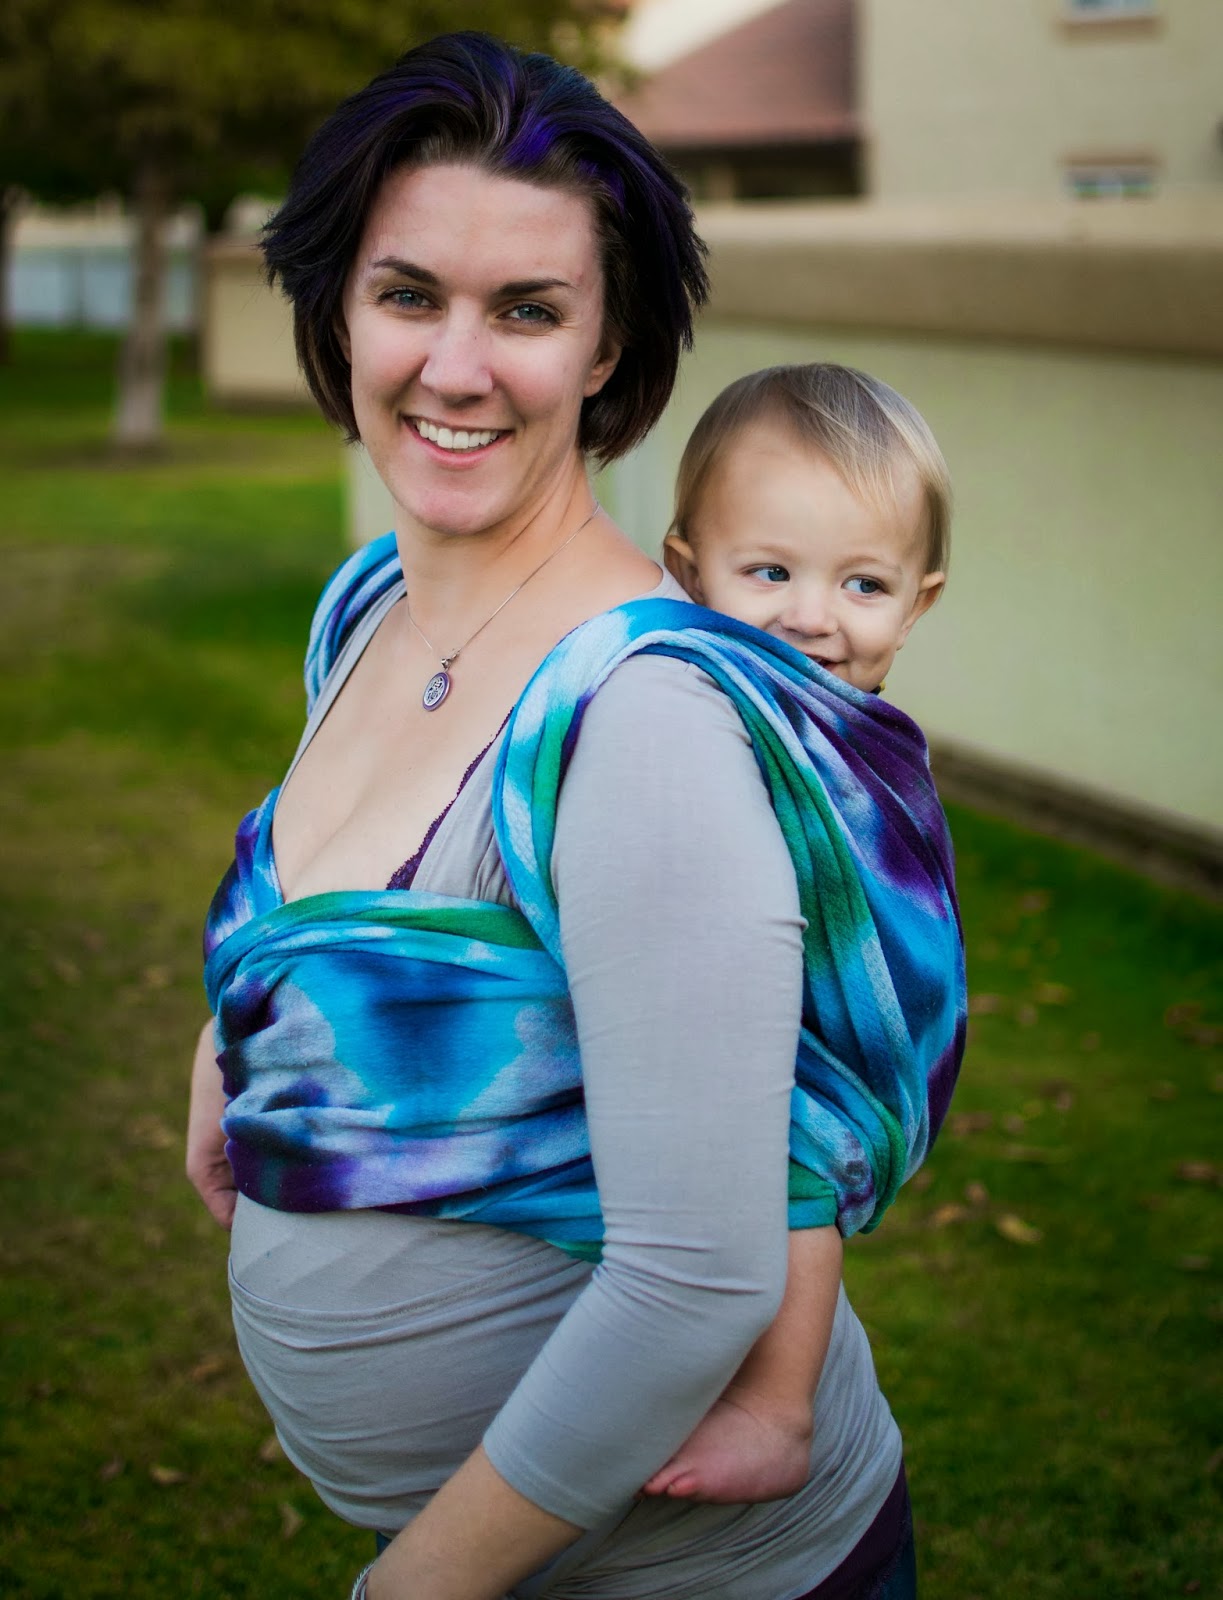
I needed your help to win a free pod conversion?  Well, I won!  Woot!  And I decided I wanted it to be a rainbow zebra carrier.  Not sure why, but seriously, why not?  Well, it's not like there is a rainbow zebra wrap on the market I could just buy, so I had to dye my own.

This wasn't my first time doing a shibori dye.  I've actually done quite a few from back when I was making and selling ring slings, but I had never done a rainbow one and I had never done a whole wrap (those were just ring sling pieces).  My first attempt I had two things go wrong:

  1. I had every color on hand except red and I was too impatient to wait for professional red to come in the mail so I used Dylon dye (which is perfectly safe for baby carriers but not a "professional" dye) for the red and in the wash it bled on the rest of the fabric making anything white pink.
  2. Because a full wrap is so much longer than just a ring sling piece I had too many layers of fabric using my usual 6 inch PVC pipe and the dye didn't penetrate all the way through so only half the wrap got dyed.

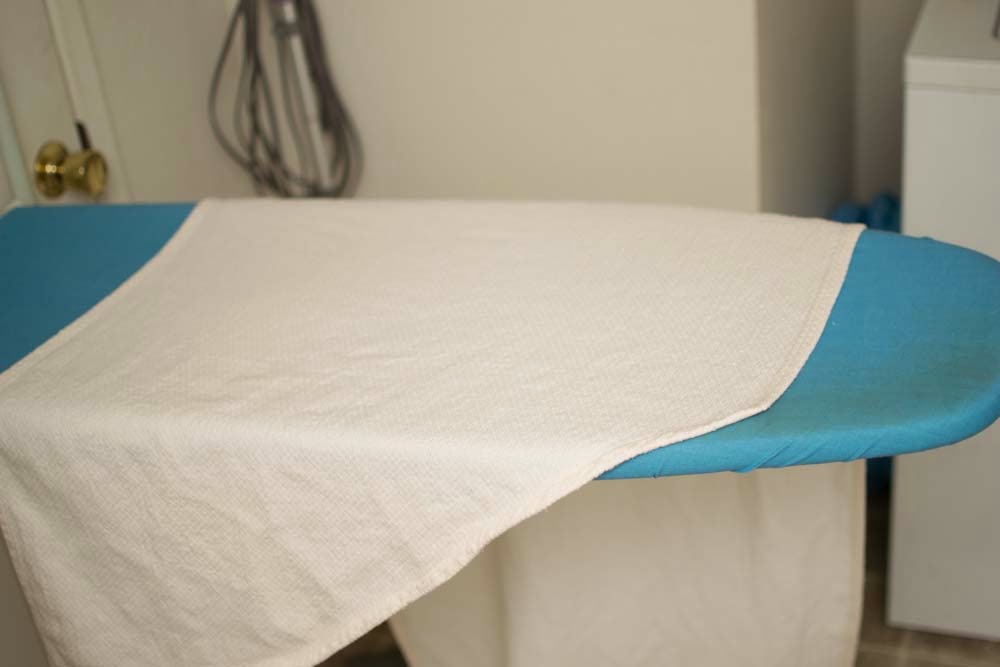
So it looked pretty good until it came out of the wash and only half the fabric was dyed (not enough for a pod, but as you can see there was enough for a ring sling!) and what should have been white was pale pink.  So I started over, and this is where you should start if you want to dye a whole wrap!

Supplies:
**Whenever you are handling soda ash or dye wear gloves and a mask**

If you're only dyeing a ring sling piece a 6 inch PVC pipe should be enough (which you can find at Home Depot or Lowes), if you're dyeing a long wrap you'll need something bigger so the wrap doesn't have as many layers wrapped around it.  I used a trash bin. You want a trash bin that is as close to a perfect cylinder as possible.
Getting Supplies
Before you get started you need to get set up.  Essentially your fabric will be wrapped around your cylinder, scrunched together, then you apply your dye.  Obviously some of the dye will drip off which is why I like to do this in the bath tub which is what the tension rod is for.  You need to cut a hole in the center of the lid and the bottom of the trash bin big enough for the tension rod to fit through so you can suspend your trash bin above the tub.  The Sailor is an overachiever and built a structure out of scrap wood to put in the tub.  This really isn't necessary, a tension rod will work just fine.

Once you have your suspension system set up in the tub wash your fabric and soak it in a soda ash solution  for 30 minutes.

Then you're going to wrap your fabric around the cylinder as tightly as you can.  With the trash can the handles got in the way so I couldn't wrap it as tight as I would have liked but it isn't the end of the world.  Once it is wound around your cylinder put zip ties sporadically every couple inches.  These will be the completely white parts after you're done. (I didn't get a good picture doing this around the trash bin, but the very first picture in the collage above shows exactly what I mean)

Once your zip ties are tightened as tight as you can get them squish the fabric together.
With the trash bin it's important you use zip ties so once you squish the fabric together you can re-tighten them since the bin is slightly smaller at the base then it is at the top.

Then you apply dye using squirt bottles.  You could do all one color.  You could do a mixture of colors.  You could do the whole effing rainbow like me! (I used Chinese Red, Golden Yellow, my orange was just a mixture of those two, New Emerald Green, Electric Blue, and Imperial Purple).

Fun tip - to put the dry dye in the bottles (since the opening is so small) I just make little funnels out of wax paper; the dye doesn't stick to the wax paper at all and I just toss each funnel after each color.

If you're doing a full rainbow like I did, in order to get the spacing right first I did a thin stripe of red and purple, then I split the center with thin stripes of yellow and green...
Then I did the orange and the blue in the middle of the two blank parts and filled everything in so the colors were at least somewhat even.  And I saturated the hell out of that fabric.
The zip ties kinda kicked up dye and may have made a pretty cool looking mess...
Then I waited.  For 24 flipping hours.

I hate waiting, but it's worth it, I promise.

Then, since it was already in the tub I just turned on the water to rinse as much of the dye out as possible.

After I rinsed out most of the extra dye I cut off the zip ties, threw it in the washing machine, and washed it with synthropol.  Then I ran it through a whole additional cycle without any detergent just to be sure it was completely rinsed and dried it as usual in the dryer.

And it was beautiful....

There isn't quite as much white as I would have liked (because the trash bin collapses slightly under the zip ties and I couldn't get a "perfect" wrap around the trash bin since it isn't a perfect cylinder) but the colors are exactly what I imagined.  Once it is converted to a pod with a hood that has a zebra mohawk mane and ears it will be more than obvious that it was meant to be a rainbow zebra.

I mailed it off to Shiny Star Designs today but it'll probably be a while since they just opened up custom slots in mid-September.  I'll be anxious to see it, but it isn't like I can really wear W these days anyway because of my stupid back.  But I'll be sure to share pictures as soon as I get the finished carrier!!

As usual, if you have any questions don't hesitate to ask!  And in case you didn't notice (and you definitely wouldn't if you're viewing in mobile mode) I added another "tab" to the blog specifically for babywearing related posts (including my other dye tutorials) so go check it out here!  And even if you're only stopping by for this tutorial and have no plans of reading any of my other posts do a girl a favor and leave a comment!  It's nice to know when people are actually reading (and even better actually using the tutorials on) my blog!
 

Template by BloggerCandy.com | Header Image by Freepik