
My name is Amanda and I have a problem...I'm addicted to dyeing wraps.
Phew! I feel better after getting that off my chest!
Let's quite the chit chat and get down to business now, shall we?
Supplies:
- Soda Ash
- Professional Fiber Reactive Dyes (I like Dharma dyes)
- Elastics
- Squirt bottles
- Gloves and a mask
- Synthropol textile detergent
- A wrap to dye (for this project I used a 4.6m Ellevill Organica Mali)
- An iron
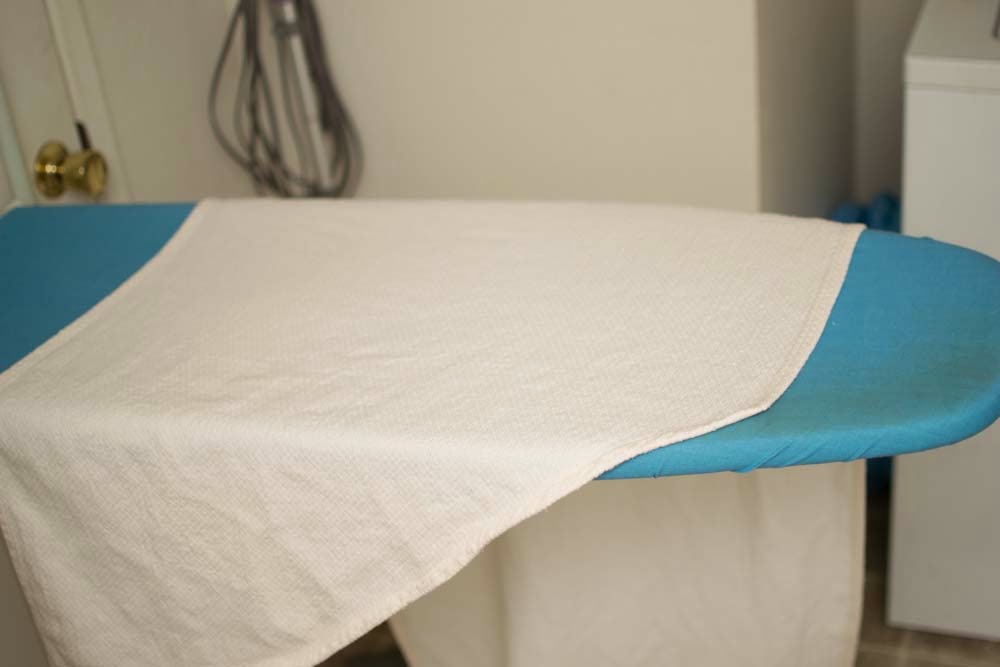
The key to getting the dye job to turn out in this chevron pattern is precise folding (which is why you need the iron). I literally ironed a crease in each fold that I did and I do not think it would have been successful (especially with the thickness of the wrap once it was all folded up) if I had skipped this.
As usual, first wash your wrap with textile detergent. You can use "normal" detergent if you're in a bind, but I'm a better-safe-than-sorry type gal when I'm permanently altering expensive fabrics.
Then you get to folding. First you're going to accordion fold the entire length of the wrap. I started with the tapers (which are super long on an Ellevill wrap, by the way) hanging off my ironing board:
Then I reached to the other side and carefully pulled the fabric up to make my first accordion fold:

And I ironed the creases.
Then I continued for the entire length of the wrap being careful to make the folds as equal as possible and ironing in between each fold.

Once it was all folded and ironed I folded up the tapers of the wrap (and you guessed it - ironed those folds as well).


Next you'll take the top corner and fold it at a 90 degree angle.

And iron that crease (yes...you're still ironing ever crease).
Then you accordion fold that corner.

I tried to get more pictures, but because of the thickness of the wrap I couldn't take my hands off of it or else the folds (despite being ironed) came un-done. All you have to do is continue to accordion fold the rest of the fabric on an angle and then secure it every couple inches with elastics.


The hardest part is over...woohoo!
Before I started this wrap I actually decided to try and "map out" the colors I was planning on using and it was a huge help while I applied the dye. All I did was take screenshots (by hitting control+print screen) of the color chips from the Dharma Website then arrange them using Paint. This is the pattern of colors I decided on:

Before you can start applying dye, soak the whole wrap in a soda ash solution for 30 minutes. While my wrap sits in soda ash I mix my dyes. And this wrap used a lot of dyes:

The colors were Dharma seafoam, paris green, turquoise, azure blue, wisteria, power berry, and jet black.
Then place your tied up wrap in a bin on top of a rack (so it doesn't end up sitting in dye) and apply your dye using squirt bottles:

Then let it sit. Some people say overnight is fine. Some people say 12-18 hours. I like to let it sit for 18-24 hours just to be safe.
Then it's ready to be rinsed! I'm a bad person and instead of running water over it to rinse it, I toss it right in the washing machine. First I did a cycle with Synthropol then I did two full cycles without any detergent to make sure all the dye was out. When you're removing your elastics, be careful...I've dyed a bajillion things and I still do stupid stuff like splatter blue dye all over my face.

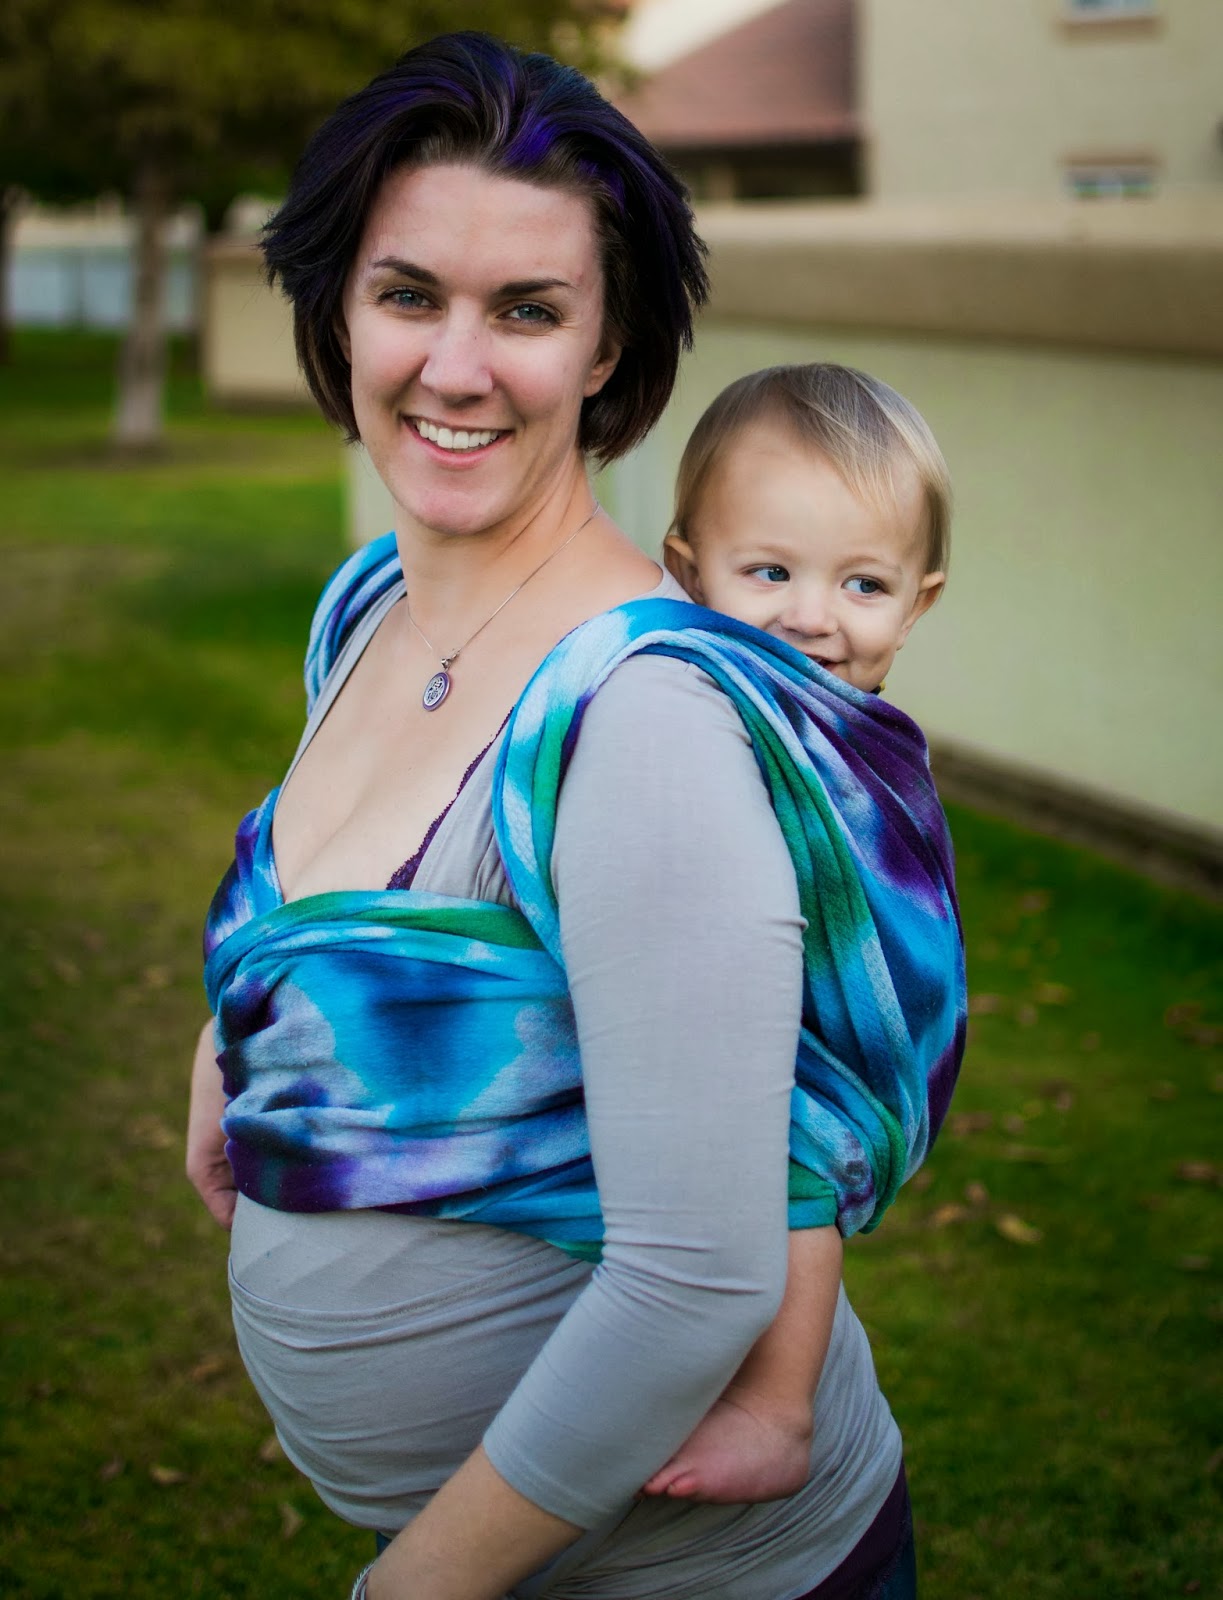
And...you're finished! Isn't she a beauty?


As usual, if you have any questions feel free to ask! And don't forget to check out my other dye tutorials and babywearing posts here!!


This is beautiful! Your directions are great! I love my Ellevill Zara the more I see your wrap the more I want one to dye.
ReplyDelete