I hate maternity pants.
Okay, I don't totally hate them, but when I was pregnant with W they NEVER fit me right and they're way more expensive than they're worth!! They were always loose in the butt but tight in the thighs and the crotch sagged in the most unflattering way. So this time, I decided to make my own!
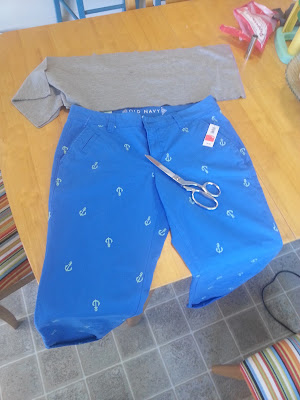
These pants I found at Old Navy on clearance for $9 and I used scrap jersey knit from another project for the panel (you don't need much; it should be tight around your belly so it helps hold the pants up and you want it to be twice as tall as you want the panel to be).
The pants should fit the width of your hips but not your actual belly...you don't want them to be huge especially since you'll be cutting down the front anyway.
First thing, you put them on and mark where the bottom of your belly bump is...
Then you cut out the front ending on either side at the seam.
After you cut it down remove the rest of the zipper and sew down the front flap and if you cut the tops of the pockets make sure they are sewn shut as well or else they'll be useless.
Like I said before, you want the panel to be tight enough to hold your pants up, but not so tight that it's uncomfortable. Your best bet is to find a jersey knit that can stretch in any direction, but as long as it has width-wise stretch it'll work. I actually got this bamboo blend fabric for a pair of jeans I also converted and it's amazing. Bamboo is like the softest fabric ever, and the stretch with this particular fabric is perfect.
You'll want to sew up the side of the fabric with a zig zag stitch (so it can still stretch a bit when you're pulling your pants up) and then fold it in half to "hide" the seam.
Now you're going to sew the panel to the front of the pants. Keeping your pants right side out, place the panel down on the pants with the front of the panel touching the front of the pants so it can be pinned down. You'll want to make sure to stretch the panel out while you pin it so the far left edge is pinned to the far left edge of the pants, the far right edge to the far right of the pants, and the center point is pinned to where the zipper is on the pants...
 |
| I don't know why Blogger keeps rotating my picture |
Now the front of the panel is on!!
The back of the panel will be sewn on the inside of the pants, so it actually looks like it's tucked into them. So now you have to turn your pants right side out and pin the panel to the pants just like you did in the front...
 |
| Again, I don't know why Blogger is rotating this picture |
The very edges where you go from sewing the panel to the outside of the pants to sewing them to the inside of the pants is a little wonky, but you really don't notice when they're on...
And you're finished!! Now you get to enjoy having maternity pants that actually fit!!!
I think I'm going to try and find some thrift-store pants to convert to make the project even less expensive (the jeans I converted are amazingly comfortable "boyfriend style" jeans that I got at Marshall's for $20).
I might come back and add pictures of me "modeling" the jeans I converted so be sure to check back if you're interested in seeing them "in action."


This is way intriguing but also seems so daunting to me! I guess I am just NOT a sew-er. I would be pinning and hot gluing and just making a mess! Great work! I do want to see them on!
ReplyDelete